
As I've been busy making a playing area for HOTT (DBA) and painting up new off-the-shelf 10mm Pendraken Armies, I thought it was time I tried them out in anger. So this afternoon (after I'd done all my jobs!) I sat down to play my first solo HOTT battle between my recently completed Ratmen and Barbarian armies.

Barbarian Army: (above)
1 x Hero General (4AP) – mounted on Bison
1 x Riders (2AP) - mounted on Bison
1 x Magician (4AP)
6 x Warband (12AP)
1 x Shooters (2AP)

Ratmen Army: (above)
1 x Hero General (4AP)
1 x Shooters (2AP) – Blunderbus & Bows
1 x Artillery (3AP) – Gas Bombs
1 x Magician (4AP)
2 x Beasts (4AP)
3 x Lurkers (3AP)
4 x Hordes (4AP)
Preliminaries: Dicing for attacker/defender the Ratmen won. They then dice for the starting edge and this gave them the edge beyond the river. The Barbarians deployed within 600 paces of the opposite edge, with their newly finished Stronghold just to the right of centre.


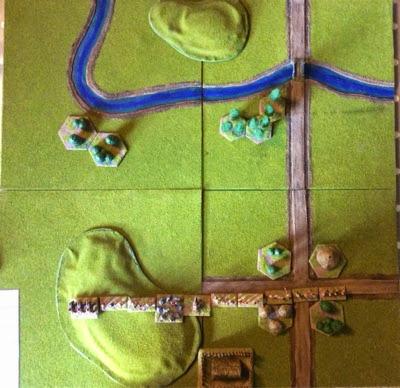
My plan, for what it's worth, had the Riders covering the left flank, the Shooters the right and the General and his Wizard in the centred flanked by Warbands.

The opposing Ratmen deployed just their side of the river. General and Magician centrally located, surrounded by Hordes and Beasts. A base of Shooters and Artillery in amongst them, the Lurkers not deployed for now.
Move 1: Defender first move, d6 score of 6PIPs. A lack of familiarity with the rules led me to separate out the Magician and Riders who I now see can both move at 500 paces per move. To correct the error I used up 3PIPs to move them together and used the rest to move the army forwards 200 paces.

Move 2: the Ratmen were also suffering from my lack of experience. I'd split my two groups of Beasts up where they could have been grouped together as a faster moving attack force. Instead I had to satisfy myself with crossing the river 200 Paces. This has left half the force facing two separate bits of bad going - woods. With my last PIPs I deployed the three Lurker bases to face the Barbarian troops in their bit of bad going (built up area/ woods).
The first base of Lurkers were beaten off by the Barbarian Warband and flee off table. The second had more success driving their opponents back one base depth. The final Lurkers attack achieved a stalemate.

Move 3: only 3PIPs this time. Moved the Riders/Magician combo towards the left hand wood and closed two Warband bases onto the remaining Lurkers.
Combat in the BUA was not as conclusive as I'd hoped. One more Lurker element forced to flee the table but the other put up stiff resistance and drove their Warband opponent back.


Move 5: 5 PIPs gave the Barbarians a few options. They decided to reform their line protecting the Stronghold using 2PIPs and send the Riders in to attack the Ratmen's flank using one more PIP. The final two were saved for a magical attack on the Beasts coming out of the left hand woods.

The Riders attack drove the Horde back into the woods but failed to destroy them. The Magicians attempts to ensorcel the Beasts base were thwarted by the woods, leading them to recoil back. (I realised afterwards that there was no need for them to do this).

Move 6: the Ratmen go on the attack. The Horde lurched from the woods to attack the Barbarian Riders as do the Beasts who charge into the unsuccessful Magicians. The rest of the army maintains it's steady advance towards the Barbarian line.
I'd hoped to fire the Artillery, but couldn't as they'd moved this turn. The combat between the riders and Horde resulted in a recoil for the Riders whilst the hand to hand between the Magicians and Beasts was a draw.

Move 7: a maximum throw of six PIPs allowed the Barbarian General to link up his line and advance towards the Ratmen Horde for a final showdown in Move 8(?). The Riders returned to the fray and the Magicians were determined to deal with the Beasts to their front.
The Barbarian Shooters released an ineffective salvo on the nearest Beasts. The Riders and Ratmen Horde fought to a draw and the Magicians were forced to recoil.

Move 8: Ratmen launch an all or nothing assault on the Barbarian line. Support fire from their Artillery being successful in destroying the Barbarian Shooters on their right flank.
However things did not go their way.

The Magicians beat off the attack from the Beasts and in the main combat, three elements were destroyed (the General, 1 x Horde and 1 x Beast).

As all but three of the Ratmen elements were commanded directly by the General, the Ratmen losses we're too great and they would have been defeated on their next bound.

Victory for the Barbarian Hordes!
I really enjoyed myself playing this game. Once you get beyond Phil Barkers confusing use of the English language you are away. I found a QRS on the Yahoo site which is all you need once you get going. I can't wait for the next encounter.
No comments:
Post a Comment