E-Mail:

If you enjoyed visiting this blog, please leave a comment or feel free to contact me by e-mail: timstanks@icloud.com

Search This Blog

Thursday 15 February 2018

3D Printed 15mm Fv432 - Team Yankee

My confidence is growing with the i3 Mini so time to move on and print something in 15mm (basically my justification for buying it in the first place).

As I've recently bought a British Mechanised Infantry Platoon from Bottlefront and a Milan Anti-Tank Platoon, I need quite a few Fv432 APCs to transport them around.

Searching the internet for suitable .stl files didn't throw up a whole lot of choice until I found a very competent looking model on Thingiverse designed by Steve Lava (lava808)

https://www.thingiverse.com/thing:2396281


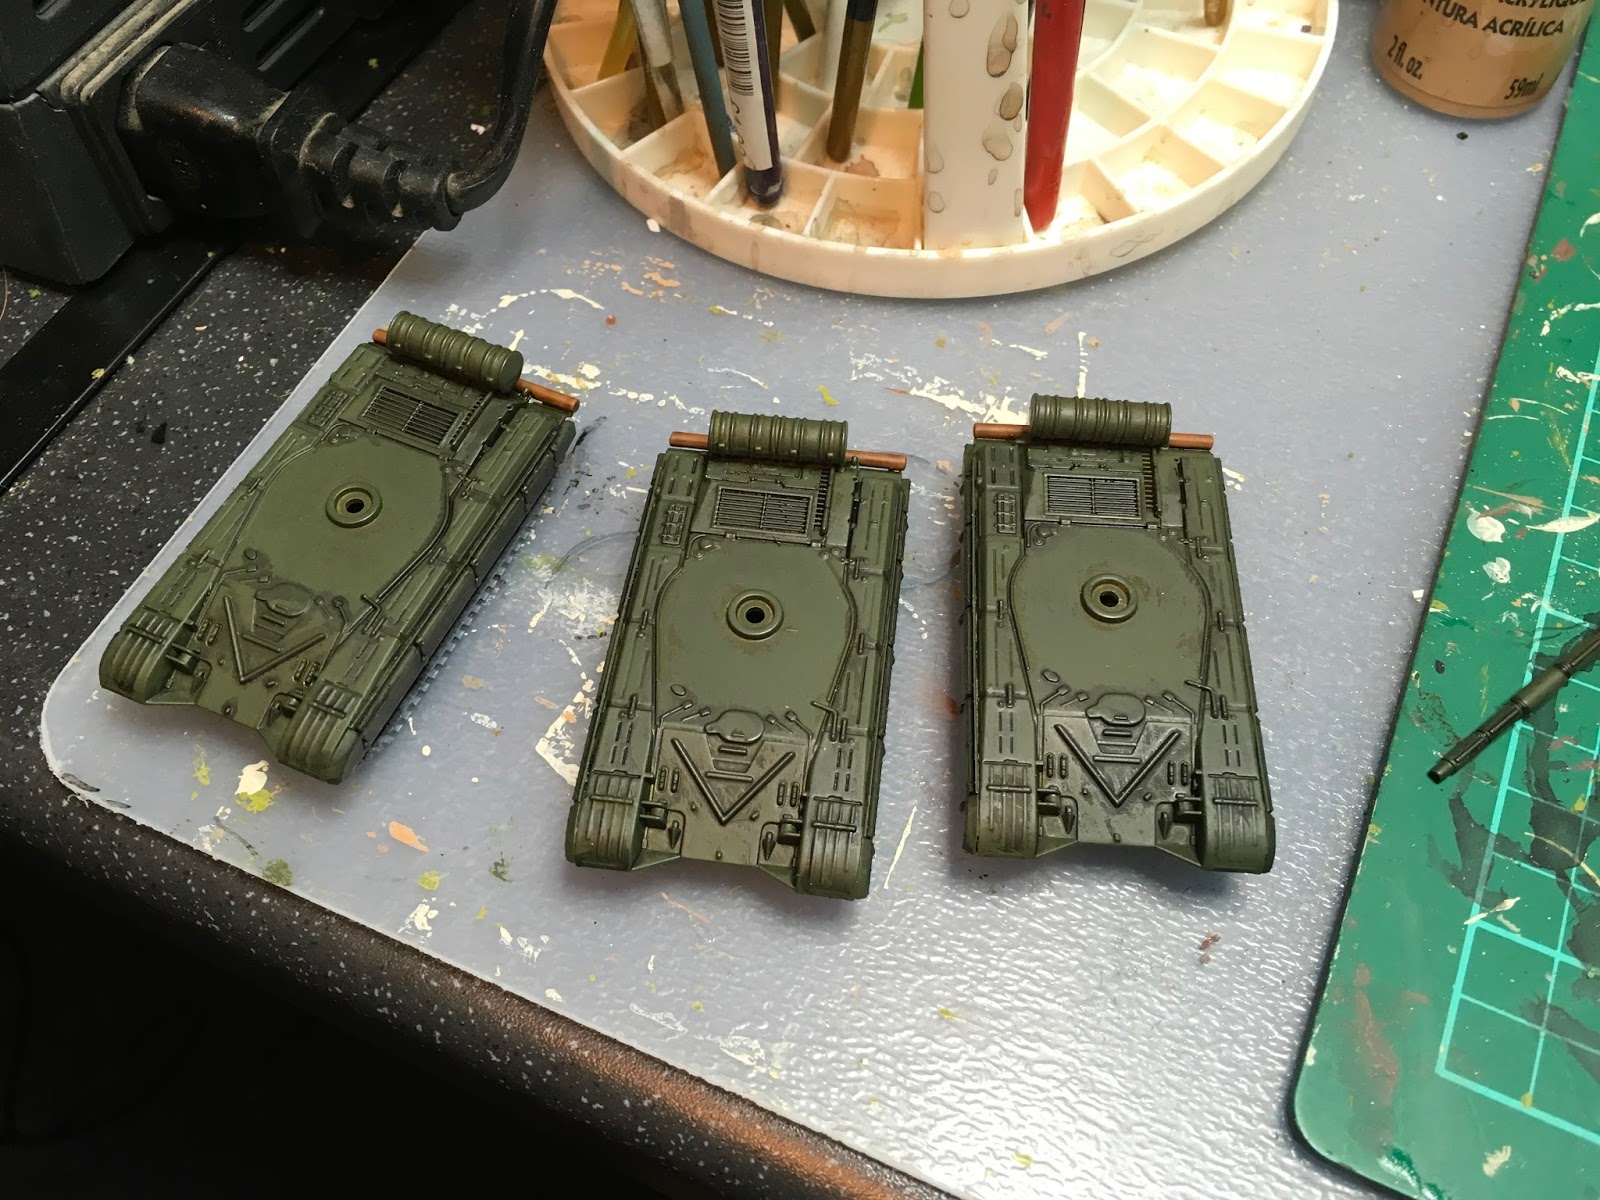
Listed as an Fv423 IFV, the design is in four parts (see above with support material in place & below cleaned up ready to assemble)

  1. Main Hull
  2. Back panel with door
  3. Engine louvred cover 1
  4. Engine louvred cover 2

It prints from the rear of the hull upwards, using support material but no need for infill as the hull is in effect a hollow box.


Once printed out in white PLA, I simply removed the support materials with pliers and glued the louvres and rear panel onto the hull with super glue.


Some filler will be required around the rear panel to finish things off. The print took 3.75 hours to complete. I'm very happy with the results. Thanks to Steve for sharing so generously.


Tuesday 13 February 2018

3D Printing - My First Tank!

As printing tanks was my primary excuse for buying the 3D Printer  I thought I'd better not leave it too long to try this out.

The internet is a remarkable source for all manner of things. This includes an almost dazzling supply of 3D printable files for all different types of tanks, guns, terrain pieces etc. in any scale you fancy!

I started modestly with a search in Thingiverse that revealed a collection of 1/200th AFVs created by Marco Bergman, and shared most generously, free of charge to anyone who wants to use them privately. (https://www.thingiverse.com/thing:232248)

I decided to start with the US M1A1 so downloaded the .stl file and converted it to .gcode in Cura.

The file as downloaded had the hull and turret stood on end, gun and bow facing upwards. This is probably a sensible way to go as many printers (mine included) have quite limited print bed sizes. However for reasons known only to myself, I decided to lay both parts flat and print them side by side. The picture below shows how that progressed.

  1. The print started with creating a "raft" to support the finished parts. This helps to ensure good adherence to the bed (but doesn't guarantee it!)
  2. The supporting ribs for the underside of the turret are starting to appear here. These are easily re,moved afterwards.
  3. Another view of the turret building up layer by layer
  4. The almost completed turret has now appeared
  5. The settings used on my printer, showing the 1.75 hour build time!

Here you can see the hull & turret from above, still attached to the "raft"


This side on shot illustrates the supporting material that fills the turret underside

This side view shows the support material under the rear tracks and over the wheels


Once I'd removed the support material, I was amazed to find the detailed running gear down each side beneath the bazooka plates. 


Here you can see the ribbed effect you can get through the build up of layers of extruded plastic. This is more pronounced on a smaller model as I chose 0.15mm layers where I could have chosen 0.1mm. Don't forget this tank is only 30mm long!

I have in my collection a number of 1/200 M1's. Below is a comparison shot alongside a Skytrex Action 200 model. Slightly shorter, but not a bad match.


I painted the finished model and based it on mdf to match the others in my collection.


For a first effort I think it's quite acceptable. Remembering that when viewed on the tabletop the ribs are all but invisible to someone as old as me!


I hadn't previously considered printing models to this scale, I was expecting to be going for 15mm scale, bit I'm pleasantly surprised at the quality. I doubt very much this will be the last one I print at 1/200th scale.

New Toy - Part Two

Having got the printer working I wanted to try out my 3D design for a Rommel terrain tile.

You'll have seen from previous posts that I standardised on 60x60mm tiles for all my terrain pieces (Bocage, Marsh, Woods, Built Up Areas) and had tried my hand at scratch building a BUA tile.

As I need more of these (especially for my Operation Perch scenario) I thought this to be the ideal subject for a 1st print.

I created the design in Tinkercad. This is a very easy to use, on line package, that allows you to create things in 3D by combining pre-determined geometric shapes.

As A house is simply a box with a triangular section on top to form the roof, you can see that this wasn't too taxing!

My first attempt in the previous post was at 40x40mm. So I simply enlarged it to 60x60mm for the final print.

Once you're happy with the design, you save it as an .stl file. Then using Curs (the slicing software provided with my printer) you convert this to a .gcode file. This is now broken down into 0.1mm slices to be printed one on top of another.
And here's the finished article printed in PLA plastic. It took around 2.5 hours to complete!

You will notice that the base has warped slightly. This was due to the print not adhering to the base plate. Part of the steep learning curve!
You can see there's a bit of cleaning up to do, but largely I'm quite happy with that as a 1st attempt.

I think I'll glue this to a 60x60mm mdf base to straighten it out, before I paint it up and maybe move a few buildings around before I try and print once more.
The finished article
Filled with enthusiasm, I think its time to print a tank......!

Friday 9 February 2018

New Toy - Part One

It arrived earlier this week, now all I need to do is work out how to print tanks with it!!
 When I get it sussed I've created this little beauty to test it out.
Its a 40x40mm built up area (BUA) terrain tile for my 2mm Rommel terrain pieces.

Created in just 10 minutes with Tinkercad!

I'll let you see the finished article when I get one printed (fingers crossed)

Thursday 1 February 2018

Team Yankee - M1 Painting

I finished the M1's (Battlefront & Zvezda) in the same finish.

Up until the application of the MERDC (Mobility Equipment Research & Design Command) camouflage the process was identical to the T64's in my previous post.

I chose to finish the in the Verdant Summer version of MERDC so firstly sprayed light green blotches at random.
Then I added Iraqi Sand lines around the outer edges of some of the blotches and did the same with shorter black lines too.
The tracks were apinted light grey and when dry given a liberal coat of Black Wash.
Then when all the details had been added, the recessed areas were given a black pin wash.
Then there was a dry-brush of Iraqi Sand, spray sand along the sides and finally a coat of varnish for protection.
All looking good now they're finished.

Can you spot which are Battlefront and which are Zvezda? Maybe not? Just goes to show a consistent paint job can help different manufacturers kits to blend together quite nicely!

Team Yankee - 15mm T64 Part Two

I painted these tanks up quite simply by firstly given them a white primer coat and then applying a coat of Vallejo Russian Green with the airbrush. Incidentally the airbrush I’m using is a reasonably price PremiAir G35 with compressed air supplied by an electric compressor.
Next I sprayed a coat of Vallejo Sepia Wash to fill the shadows.
Then a dry brushing with a slightly lightened Vallejo Russian Green.
After painting in the details (Tracks, MG, Commander, unditching beam, Mantlet cover etc.) The recessed areas were given a Vallejo Black Pin Wash.
When dry an all-over very light dry-brush with Vallejo Iraqi Sand.
I added simple number decals from an old Dragon kit and sprayed the lower sides with a dusting of Vallejo ModelAir Sand
Finally to protect all that hard work a spray coat of varnish.