E-Mail:

If you enjoyed visiting this blog, please leave a comment or feel free to contact me by e-mail: timstanks@icloud.com

Search This Blog

Tuesday, 11 March 2025

Academy 1/35 M3 Stuart "Honey"

 There's lot written about this model on the interweb. It's been around a few years now and boxed by a variety of different manufacturers. It's criticised by the serious modellers due to it's mixture of M3 & M3A1 details (namely the inclusion of a turret basket). However I fancied giving it a go to try out another idea for displaying the interior details for not very much money - the model can be found for £20-25 if you search around.


Firstly, I have to say that the model is an absolute dream to build. Everything goes together positively and quickly. There's cord included to make your tow cable and a choice of single link or rubber band tracks.

I drilled through the ends of the drive shaft shroud to allow the wire to be fed through

Sub-assemblies completed ready for painting

I intended to build the model with an LED light inside to illuminate the interior, and remove two small panels from one side so you could see in.

Viewing from this side, the model appears complete

Turn it around, and you can view the interior

The model lent itself to this due to the shrouded drive shaft running through the cabin - perfect to mount a single LED from a £2 set of battery powered Christmas lights. The wire would go in through the floor escape hatch and through the drive shaft shroud, the LED bulb coming to rest around where the crew's feet would be.


The side panels from the hull & turret were carefully cut out with my trusty 1cm circular saw blade and the model was assembled into sub-assemblies ready for painting.


This was done in stages before final assembly. A first for me was to try out spraying Caunter camouflage using masking tape. To accommodate the battery box I designed and 3D printed a deeper than normal mounting base.

Note the "Glowing Glacis"😂

I really enjoyed building this kit and would thoroughly recommend it to anyone from beginner upwards. The only thing I need to do is beef up the paint thickness on the glacis plate to stop the light from shining through😂

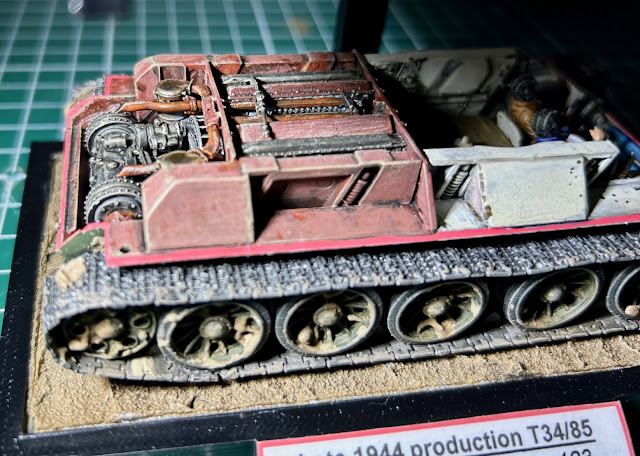
Hobby Boss 1/48 T34/85

If I had to summarise this kit I would say it's VERY good value for money and not for the beginner!


The model comes with a very full interior (all that's missing are the internal fuel tanks), link and length tracks and a myriad of finely moulded grey plastic parts.


The instructions are good, but need to be closely followed. The location for a number of parts is somewhat vague so lots of dry assembly and testing fit is required to avoid later disappointment.


Rubicon Russian Tank Crew Figures

The tracks are assembled around two provided jigs......should be straight forward I hear you say? Well, on several occasions I nearly gave up and shelved the model. They do not go together especially well.


To reveal the turret detail I carefully cut the top plate out using a Dremel type tool with a 1cm circular saw blade. And to populate the vehicle I use the Rubicon Russian Tank crew figure set. This comprises two seat multipose figures and two 3/4 commander figures. Whilst strictly they are 1/56th scale, they look just fine in a 1/48th vehicle.

Scratch built fuel tanks, front & rear


Finally when completed I displayed this model at the South Wales MAFVA show in January and walked away with the Tony Evan Award for an out of the box model, so was pleased I got there in the end 😊

Thursday, 2 January 2025

Remodeled Loser Shed Workbench for 2025

 Happy New Year to my blog followers!

For some time I've been thinking that the work space on my "Loser Shed" workbench was too small. It was fine for painting figures, but too small when constructing kits or terrain pieces.


The right hand half is where I paint figures and the left hand half is set up for airbrushing.

As you might notice, the bench is below a window, so has great natural lighting, so I wanted to keep it where it was if I could. I then had a brainwave! If I could widen the existing window sill, I could raise a lot of what's currently on the bench to a position above it. This would give me much more usable space.

I worked out that I could create a simple free standing shelf, the same height as the sill, from a single 2.4metre decking board (£8 from Wickes).

I could now lift up my painting storage and had room for an A2 cutting board to replace my old A3 one.

A quick trip to our local Dunelm store and I had some cheap storage boxes to better organise my paints, tools and modelling materials.

My compressor is now mounted more securely and I have room to mount my angle poise lamp over the airbrushing area. I've also repurposed my old spice rack to store my growing collection of airbrush formulated paints.

I've also started to buy myself some better quality modeling tools. One of which is a new set of side cutters. I've only ever used cheap (£5-10) clippers before, so I decided I needed a set of true precision cutters. The Amazon blurb for these sounded like they were what I was after....

  • Precise cutting: Cutting parts with the single-edge nipper is as easy as cutting through butter, and it results in a smoother flat surface on the cut parts which minimizes whitening marks.
  • Ultra-thin single-edge: The model nipper with a single-sided open edge thin blade design, high-quality chrome vanadium steel production, which allows for precise cutting and accuracy like never before.

They are priced at £25 on Amazon, but my wife found them on Temu for less that £12. Having used them for a couple of week's now, I'm very impressed. They really are so much better than what I've been used to. Recommended.


Thursday, 21 November 2024

Battle of Gettysburg Tour – September 2024

 I have long held the ambition to one day visit an American Civil War battlefield. Then, in late September, whilst working in the US, I found myself with a Saturday off and the battlefield of all Civil War battlefields “only” 4 hours drive from where I was staying!

Free tourist map provided by the information desk

It was a no-brainer, as they say, and I was up and out of the hotel and on the road by 6am!

Rebel Uniform

The journey from Pittsburgh was straight forwards and on interstate dual carriageway nearly the entire way there.

Selection of handguns!

Arriving amongst the rain and mist at 10am, I was surprised to see how the charming little town of Gettysburg appears to still be made up of buildings contemporary to the war.

Recalling the Gettysburg address

I made my way to the Gettysburg National Military Park Museum & Visitor Center thinking this would be a good start and would set the scene for my visit.

The Gun line in the Cyclorama

I was not disappointed. The visitor’s centre is modern and roomy. It has toilets, an information desk, restaurant, museum, well-stocked gift shop and the Cyclorama (a circular painting by the French artist Paul Philippoteaux depicting Pickett's Charge, the climactic Confederate attack on the Union forces during the Battle of Gettysburg on July 3, 1863).

The 1832 "Old Dorm" Seminary Ridge

To enter the museum & Cyclorama there was a fee, which could be grouped together with a 2-hour coach tour. As I only had one day to visit & wanted to get the very most from the experience, I opted for the whole package ($53). I surmised that if time allowed, I could always re-visit any viewpoints that interested me in my car after the tour was finished.

Tour Bus - 2 hour tours

This proved to be a good choice. The museum tells the story of the whole Civil War and where the battle of Gettysburg fits in context. It was excellent, if a little darkly lit, with many contemporary items, weapons & uniforms displayed.

Typical rail fences on Seminary Ridge

The Cyclorama is very evocative. I’ve visited a similar thing on the battlefield at Waterloo and it’s a great way to place the viewer at point in time during a momentous event!

Starting point for Pickett's Charge

The coach tour was excellent. The tour guide was from Atlanta (a Southerner!) who did a great job to tell the story from both points of view. In fact, that was a great learning for me. When a country looks back on a Civil War, you have to remain positive and not point fingers at “Them & us” otherwise you just perpetuate the animosity.

The ground over which they charged

They took us around the site following the course of the battle over three days. Stopping every few hundred metres to get out and view the myriads of memorials etc. Many of these- the Confederate ones –are at risk from the US Woke/Cancel-Culture and may disappear.

The Devil's Den beneath Little Round Top

The area is a National Military Park supported by the American Battlefield Trust. I had downloaded their visitor information app ready to do a self-tour and found it extremely helpful when I drove around later on. The app is GPS enabled and will literally guide you from stand to stand and then give you all the information you could possibly need in written, spoken, pictorial & video format!! It’s amazing and completely free. You could easily conduct a “Tour” from the comfort of your armchair, it’s really that good.

The View from Little Round Top

The landscape is little changed (a few new buildings, better roads and slightly expanded forestry) from 1863 and you can really understand the tactical challenges faced by the two opponents.

The Peach Orchard

Many of the opposing forces front lines are marked out with rail fencing & preserved cannon. This makes it easy to understand the areas fought over.

The Wheatfield

The tour took you to all the iconic landmarks. Amongst the most iconic were Jenny Wade’s house, Seminary Ridge, scene of Pickett’s Charge, Little Round Top, the Peach Orchard, the Wheatfield Devil’s Den, both commander’s HQs and the Gettysburg National Cemetery.

Gettysburg National Cemetery

I spent the entire day there, leaving for my hotel in Pittsburgh at 4.30pm just as it was starting to get darker.

Longstreet Memorial

Gettysburg is a fantastic place to visit. I could easily have spent 2-3 days there. The town itself deserves more detailed exploration and there were several more museums to be visited that I just didn’t have the time to see. Everything is accessible and well sign posted. There’s ample carparking and sufficient public toilets around the site.

Lee's HQ during the battle

I literally took hundreds of photographs, but I’ve just inflicted a select few to help illustrate the article!

View towards Little Round Top

If you ever get the opportunity to visit, don’t miss out!

Monday, 18 November 2024

Rubicon 1/56 - M106A1 4.2" Mortar Carrier - Part Two

The inner areas were then carefully masked before spraying the exterior with Vallejo Air 71.043 – US Olive Drab. A new innovation for me here, I printed up a couple of stencils the diameter of the road wheels and idler/drive sprockets so after spraying the entire track unit in a Dark Grey, I could pick out the individual wheels in Olive Drab without over spraying the track!


At this point I painted in red the areas where the vehicle had been “cut” open.


Details on the hull (like the spade, tow rope etc.) were hand painted before the decals were applied to the outside of the hull. There are loads of options as the decal sheet covers all the M113 variants produced by Rubican. I chose to represent an imaginary vehicle with yellow call-sign number and a vehicle name as well as the usual white stars. There are even warning stencils for swimming preparation to be added to the inside of the trim vane, where they’d only be seen by the driver!!

With all the parts painted it was time to assemble it all together (less the hull top) ready for final weathering and basing. Before I did this everything had a coat of AK Ultra Matt Lucky Varnish to blend everything together.

I drew up & 3D printed a base and armature once again to display the AFV with its hull top off and the ground-deployed mortar with crew figures to its front. The base portion took 4.5 hours to print!

It took me a couple of goes to get the armatures how I liked them, before I assembled the display stand with super glue. I textured the area of the AFV mount with Vallejo Pumice and painted it a reddy brown craft paint to simulate the red earth in Vietnam. Once dry this was masked and the stand sprayed gloss black with a rattle can.

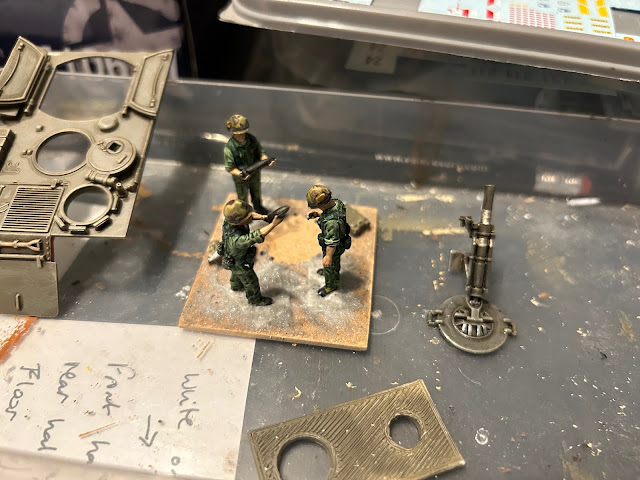
The deployed mortar and crew were mounted on a 2mm MDF base so they can be removed from the stand for transporting it. The base was textured and finished as per the main base. As well as the three crew figures there were two mortar round and two ammunition crates that were added for effect.

To blend the finished models into their bases I used some AK Red Earth pigment which did a fantastic job of giving the vehicles a well-worn look.


I’d pre-printed two inclined plates to take small information panels, on the base. I created the labels in PowerPoint, printed and laminated them and attached them to the base with double-sided tape.

The vehicle and it’s roof panel were secured to the base and armature with Blu-tac to facilitate disassembly for transit to shows etc.

And there you are. One M106A1 completed.

I’m very pleased with the end results and impressed with what a fantastic kit this is. All that detail, figures, options, decals etc. for just £20!! Bargain.